A recognizable brand and effective marketing are key to attracting new customers and establishing your business as a reputable player in the market. To maximizing success in your landscaping business, take the time to develop a unique brand identity, including a memorable logo and tagline, and create a marketing plan that incorporates a variety of channels, such as social media, local advertising, and word-of-mouth referrals.
The more services you offer, the more opportunities you will have to attract customers and grow your business. Consider offering traditional landscaping services, such as lawn care and garden design, as well as more specialized services, such as Patios and other hardscaping work, irrigation systems, and tree care.
Having great relationships with suppliers is crucial for getting the materials and equipment you need to complete jobs on time and on budget. Take the time to research and choose suppliers who offer top-notch products, competitive pricing, and dependable delivery schedules (That’ll be us, by the way).
Your reputation is everything in this industry, so it’s important to always provide high-quality work and keep your customers satisfied. Listen to their needs, respond promptly to any questions or concerns, and be open to feedback so you can continually improve.
Technology can help you run your business more efficiently and cut costs. Invest in tools such as scheduling software, project management apps, and online invoicing systems.
The landscaping industry is constantly changing, so it’s important to stay up-to-date with the latest trends, techniques, and best practices. Attend industry events, take courses, and read trade publications to keep improving your skills and knowledge.
Networking with other professionals in the landscaping industry can help you grow your business, expand your knowledge, and increase your exposure to potential customers. Join a trade association, attend networking events, work on projects with other professionals, and get Professional tips for landscaping entrepreneurs.
Trade organizations and associations: For example, the British Association of Landscape Industries (BALI) and the Landscape Institute provide resources and support for professionals in the landscaping industry.
Set achievable goals for your business and regularly check in on your progress to make sure you’re on track. Consider setting goals for revenue, customer acquisition, and market share, and use data and analytics to measure your progress and make informed decisions.
Keeping track of your finances and managing them well is critical to the success of your landscaping business. Keep detailed records of all your expenses, including materials, labour, and overhead costs, and use financial data to make smart decisions about pricing, budgeting, and investing in new tools and equipment.
The landscaping industry is always evolving, so it’s important to be aware of changing market trends and customer needs. Conduct market research to discover new opportunities and trends, and be ready to adjust your services and marketing strategies to meet the changing demands of your customers.
Starting a successful landscaping business takes hard work, smart planning, and a dedication to continuous improvement. By following these 10 ways to succeed in your landscaping business, you can increase your chances of success and create a thriving business in this exciting industry.
This Rough Guide To Indian Sandstone will explain that, in addition to looking great and offering great natural variety and character within each stone, sandstone has been used as paving for millennia. It is also hard-wearing and long-lasting, but can also be quarried, hewn and cut into desired shapes easily. Additionally, sandstone is easily available and abundant. These factors explain why it is so popular today and in the past, and why it is often used in landscaping and garden design.
Sandstone slabs are a popular choice for flooring, cladding, and paving projects, and for good reason. This natural stone material offers a unique combination of durability, beauty, and versatility, making it an ideal choice for a variety of applications.
Sandstone is a sedimentary rock, and is one of the most common on Earth. It is formed on ocean floors, sea and lake beds, where sands, silts and other clastic materials settle in the water. Over time, gravity, the pressure of the water above and often chemical bonding between the particles, start to fuse these sedimentary deposits together into rock (creating sandstone).
Sandstone is a durable material that can withstand weathering and erosion, making it an excellent choice for outdoor applications. However, it can also be prone to chipping and cracking if subjected to heavy stress, so it’s important to choose the right type of sandstone for your project.
One of the defining features of sandstone is its natural color variations. From beige to red to brown to grey, the colour of sandstone slabs can vary widely, which is part of what makes this material so appealing. However, if you’re looking for a more uniform look, you may want to consider using a different type of stone, as the colour of sandstone can vary from one batch to another.
Another important factor to consider is the texture of the sandstone slabs. Some sandstone slabs have a rough texture, while others are smooth. The texture can affect the slip resistance of the slabs, so it’s important to choose a texture that’s appropriate for your intended use.
Sandstone is a porous material, meaning it can absorb liquids. If not sealed properly, this can lead to staining, so it’s important to take steps to protect the stone from liquids. This is particularly important if you’re using sandstone slabs for outdoor applications, as they’ll be exposed to the elements.
To ensure the longevity of your sandstone slabs, it’s important to perform regular cleaning and sealing. This will protect the stone from staining and deterioration, and help to maintain its appearance over time.
The cost of sandstone slabs can vary widely depending on the quality, size, and availability of the material. While sandstone slabs can be more expensive than other types of stone, they can also be more cost-effective in the long run due to their durability and low maintenance requirements.
Sandstone slabs can be found in many different countries, but the availability of the material may vary depending on your location. To ensure that you’re able to get the sandstone slabs that you need for your project, it’s important to do your research and plan ahead.
Finally, it’s important to choose sandstone slabs that are compatible with your intended use and location. The slabs should be installed by a professional to ensure proper placement and stability, and you should consider factors such as climate, soil type, and exposure to the elements when making your selection.
****************************************
Let’s take a look at the groups of Indian sandstone colours available for your patio paving (and landscaping elements, such as edging, walling and coping).
The Kandla Gray Indian Sandstone has silvery highlights and a mid-grey hue. Some stones may be darker, but the overall blend looks like dove grey.
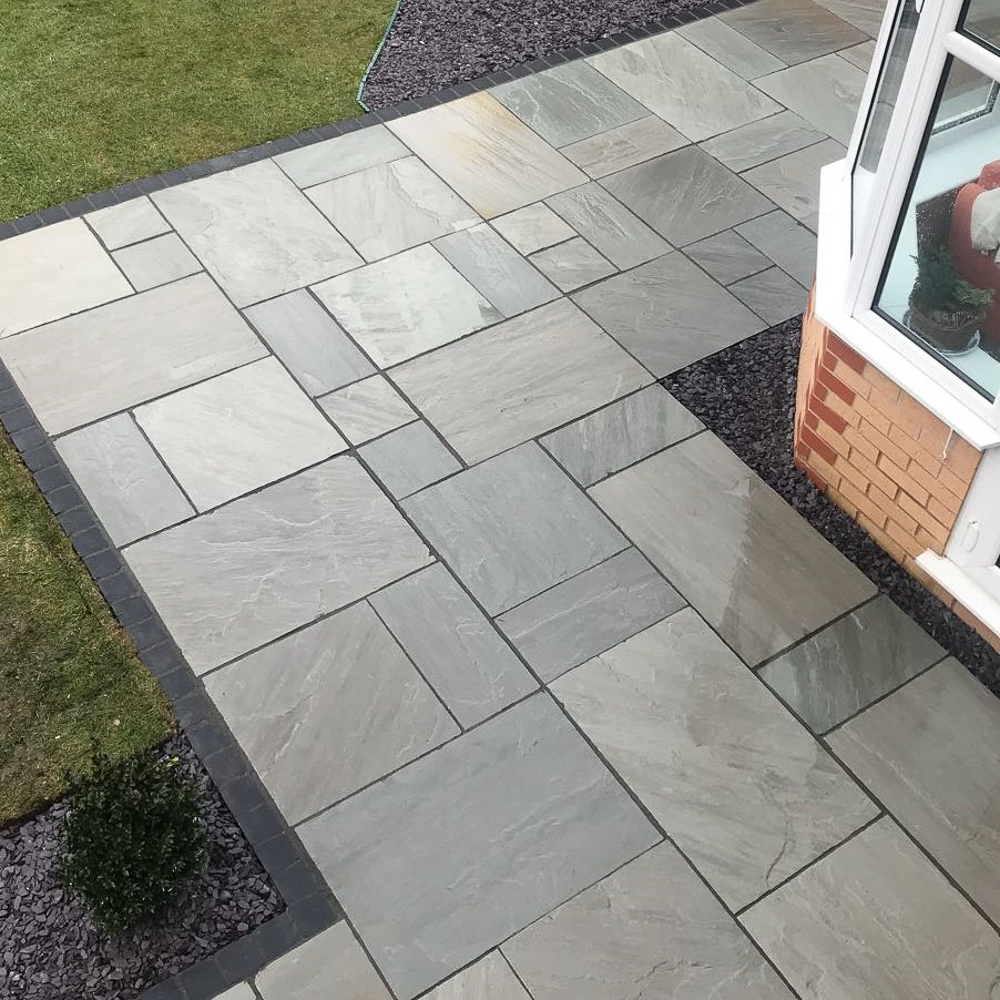
Dry Appearance: Light Grey
Wet Appearance: Mid-Grey
Raj Green Indian sandstone is a mix of browns, tans and browny-grey stones with a slight green hue to them. It provides a nice neutral palette that works well with a variety of property types.
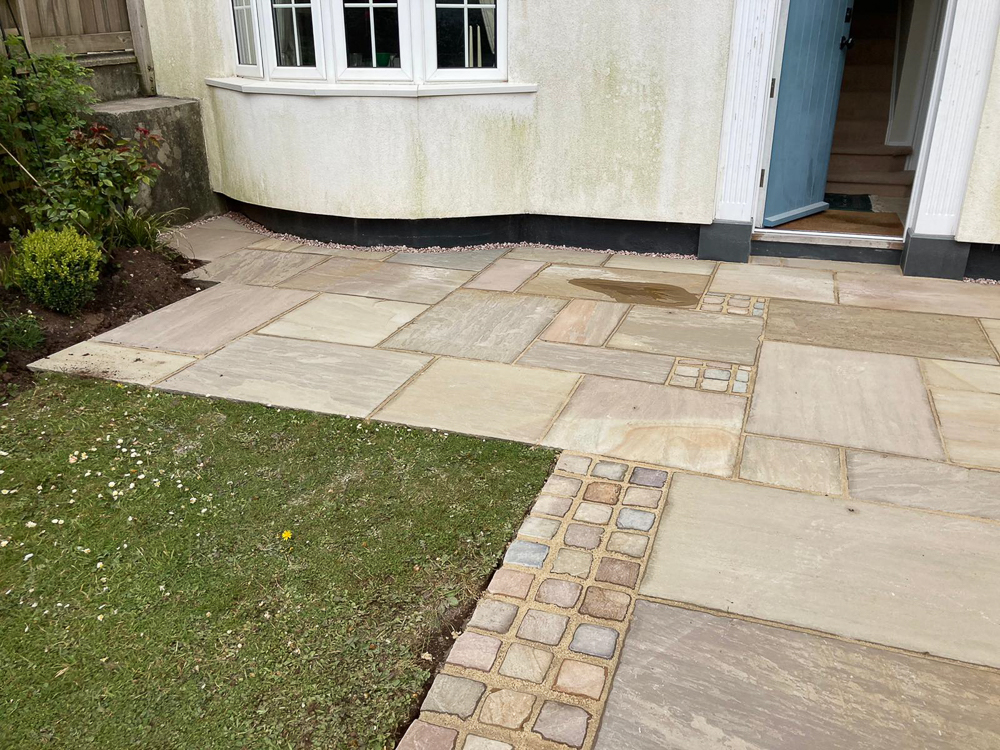
Dry Appearance: Brown, Cappuccino, Light Grey, Red, Green
Wet Appearance: Brown, Grey, Umber, Sienna, Red
There are light gold, wheat, cream, butter, mustard, and honey colours in Fossil Buff Indian sandstone. A variety of accents, blooms, waves, and striations in contrasting lighter tones can be seen in the stone, such as tan, ochre, and sienna. It is also common to find fossils in this sandstone (ferns and ammonites are commonly found).
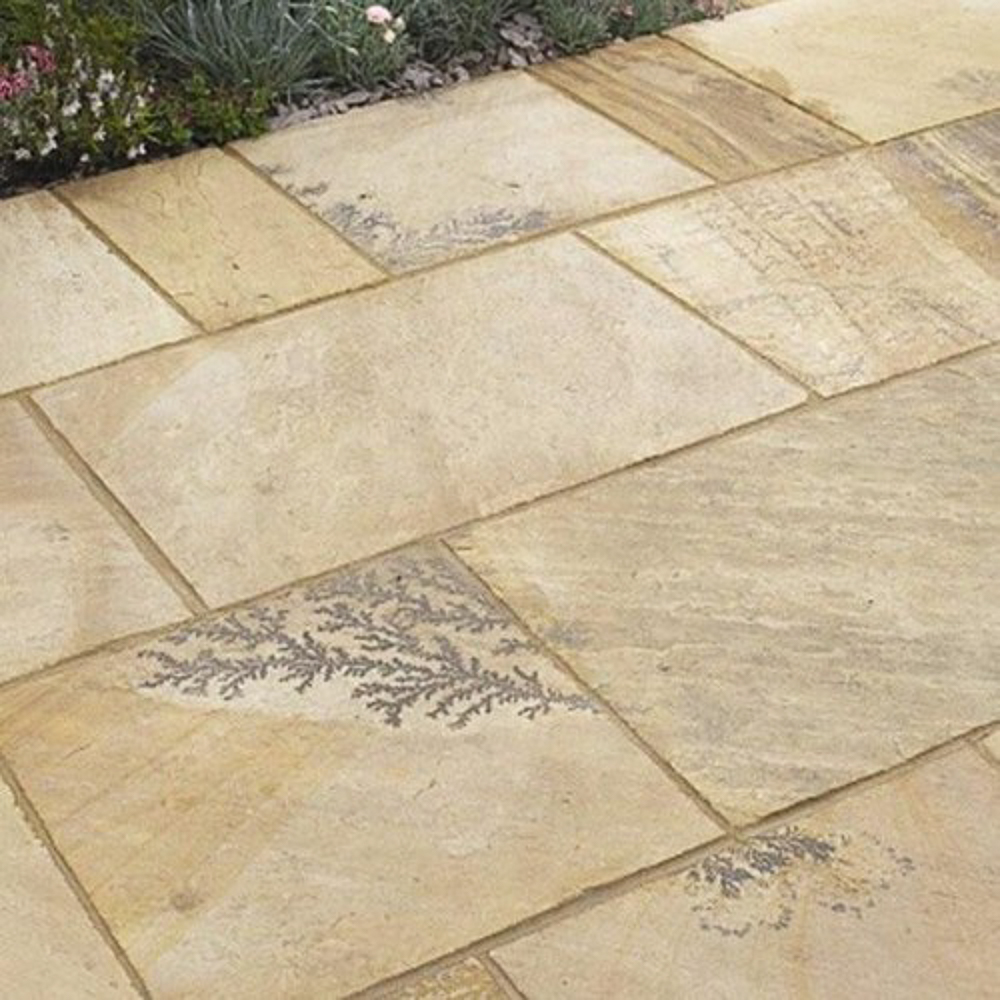
Dry Appearance: Light gold, honey and cream with darker patterns and hues
Wet Appearance: Gold, butter, honey and mustard
Autumn Brown is a classic, discreet product and one of our most popular sellers.
Its understated colour lends itself to most locations blending in and adding warmth with its varied and subtle brown tones.
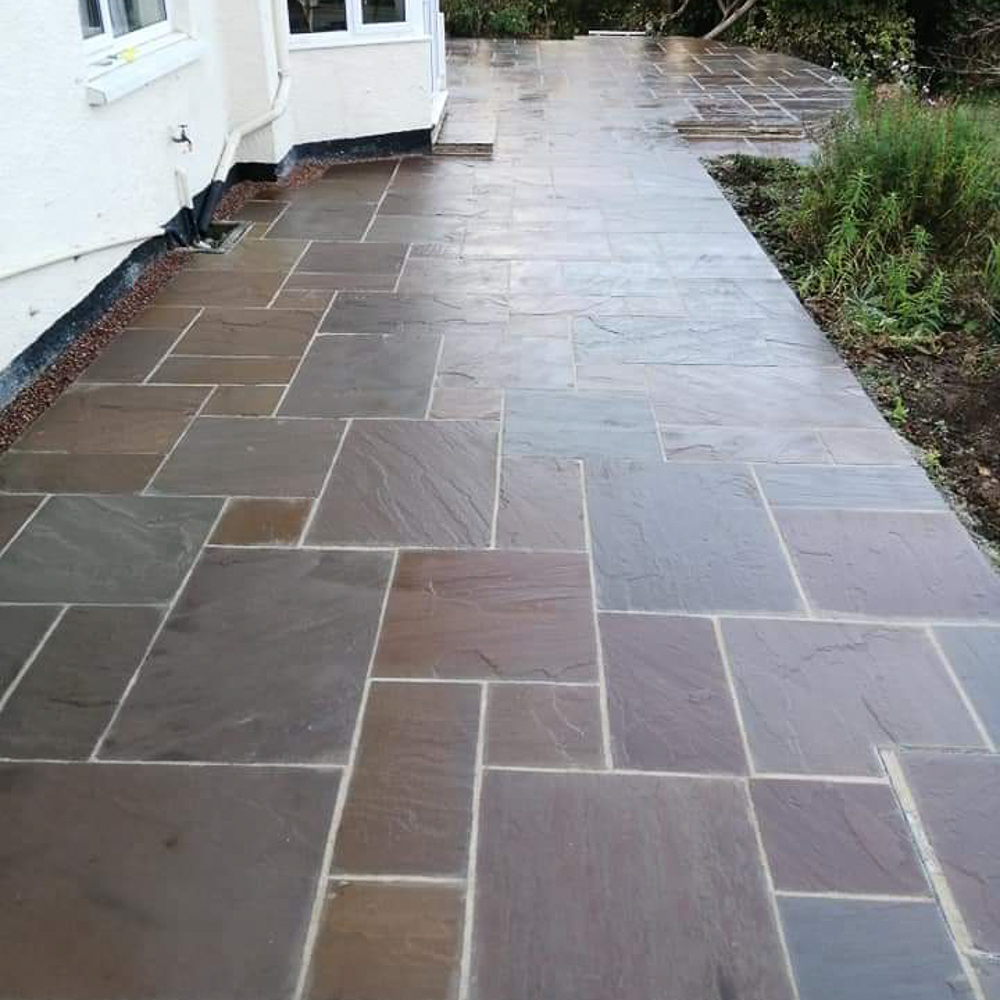
Dry Appearance: Mid-brown, honey and grey with darker patterns and hues
Wet Appearance: Mid-dark brown, Grey, Red
Rippon Indian Sandstone is a creamy / light beige colour with pink and rosy accent colours. When dry, it looks flatter, more uniform and subtle. When wet, the pinks and rosy hues come out, and it looks more vibrant and distinct.
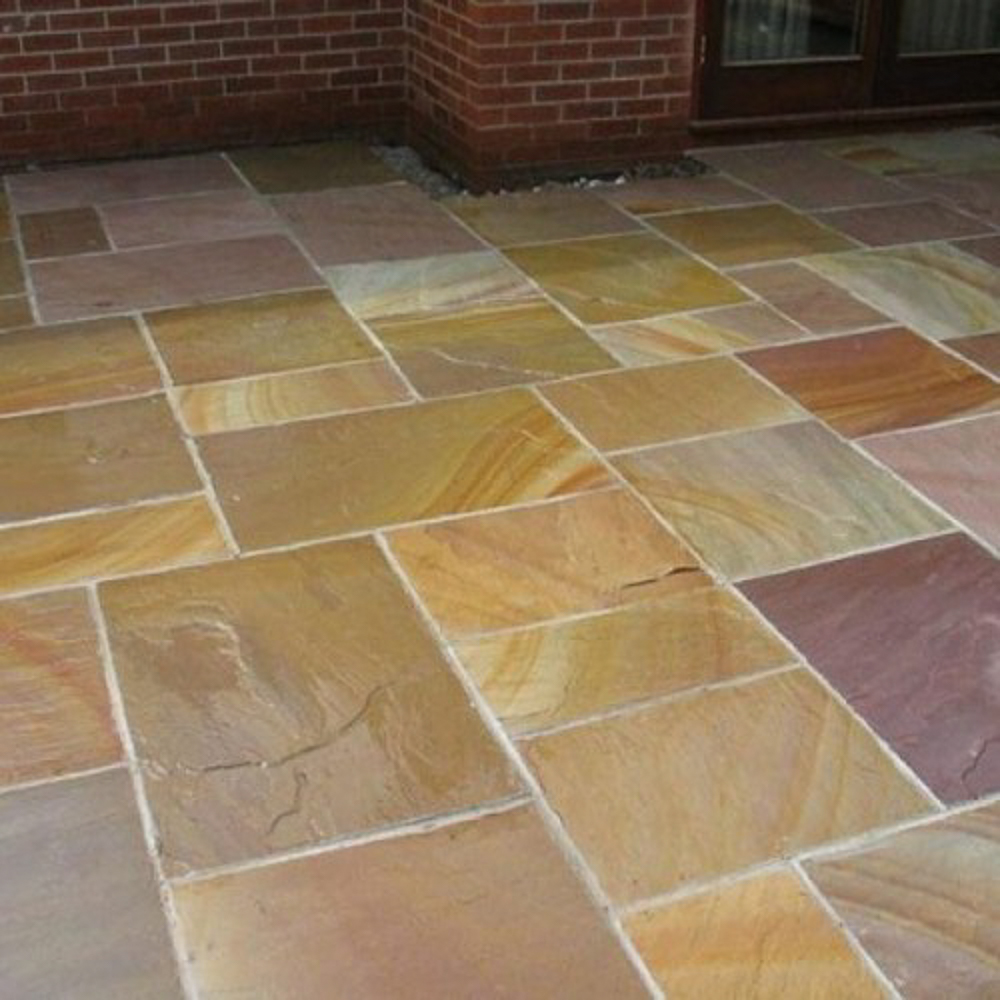
Dry Appearance: Cream, light beige, soft pastel pinks
Wet Appearance: Wheat, beige, pinks and reds & golds.
Sunset Modak Indian Sandstone is a blend of pinky-orange, terracotta, ochre, tan and brown. It has a warm, vibrant feel and really pops and shows this off when wet, when stronger oranges, pinks and reds appear.
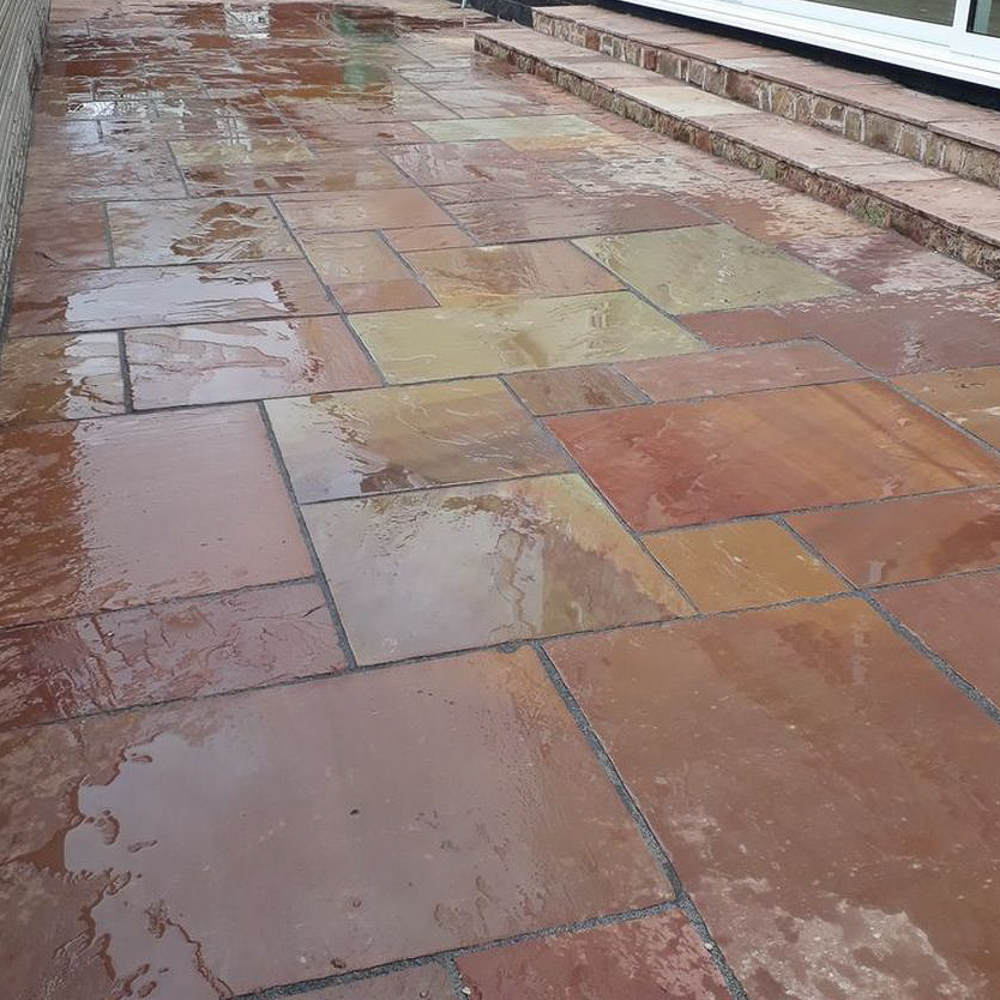
Dry Appearance: Red, Gold, Orange, Pink, Apricot, Tan and Ochre
Wet Appearance: Dark Gold, Terracotta, Red, Bronze & Brown.
Indian York paving is an unusual yet stylish Indian Sandstone product which can add a statement to any setting.
The Indian York colour is a soft variation of mid to light grey tones like the Kandla Grey with warm brown/copper/iron oxide seams and swirls within.
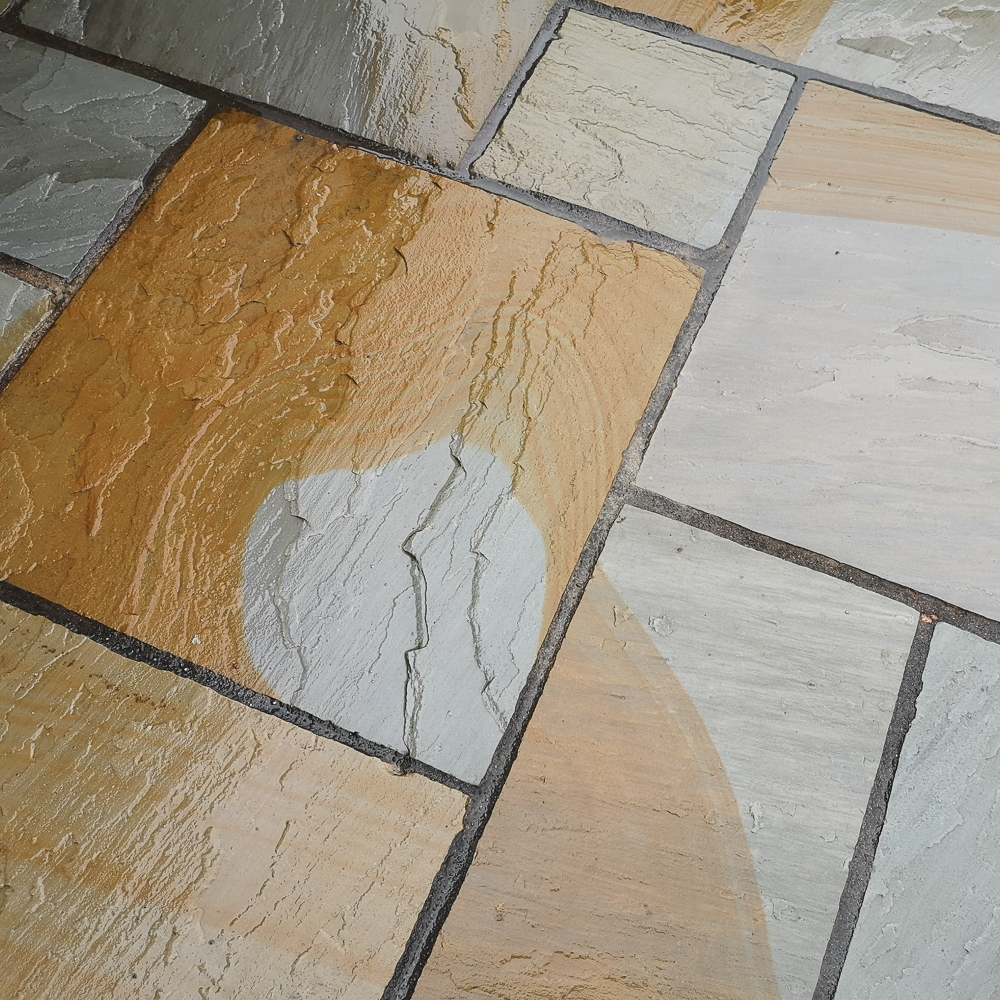
Dry Appearance: Gold, Orange, Grey & Tan
Wet Appearance: Dark Grey, Orange, Bronze & Brown.
Raveena Stone paving is a veritable cavalcade of colours, some subtle and some very vibrant. Browns, greys, purples, blues, reds and yellows in every conceivable shade combine to give a colourful finish which will always please.
The vivid colours of Raveena show considerable variation from pack to pack. So, if you are purchasing more than one pack, selecting pieces from each pack when laying will provide a natural and eye-catching blend.
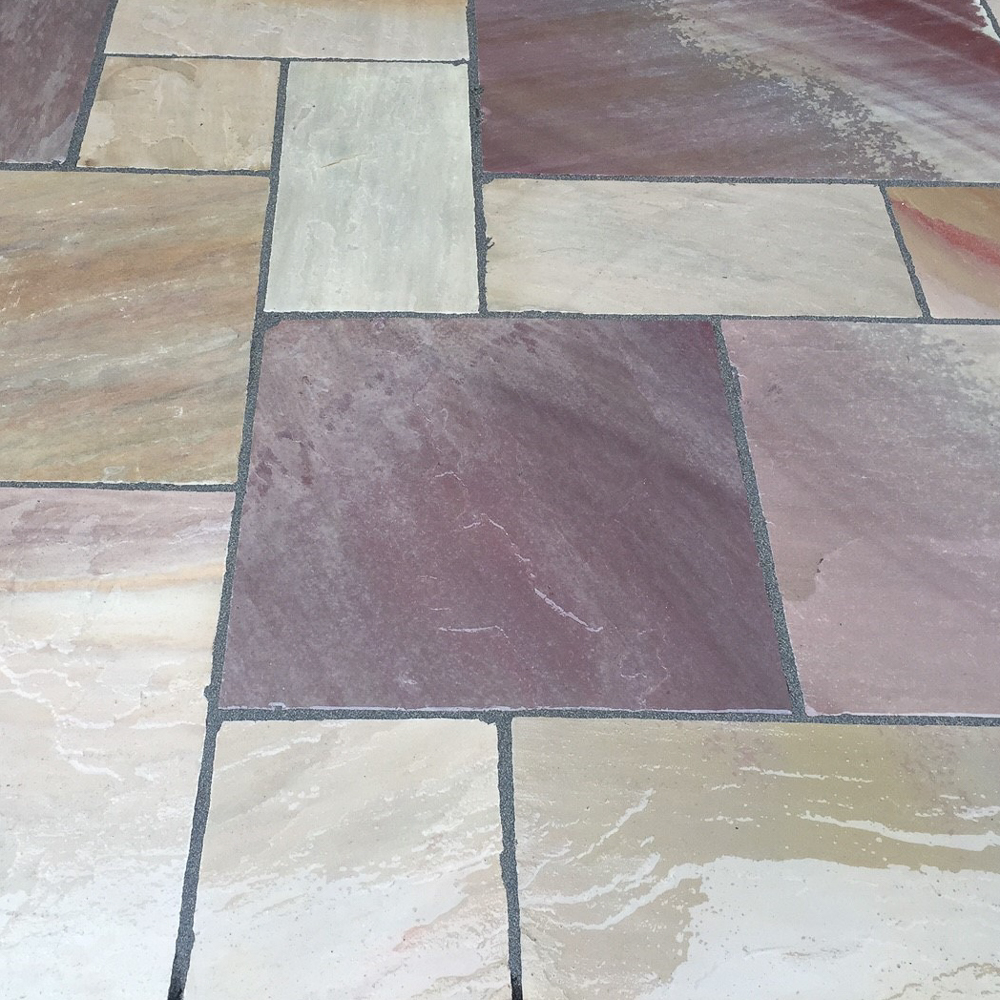
Dry Appearance: Red, Gold, Orange, Pink, Apricot, Tan and Ochre
Wet Appearance: Dark Gold, Terracotta, Red, Bronze & Brown.
Lalitpur Yellow Indian Sandstone is a deep, rich, mellow, golden colour throughout with minimal variation. It is a distinctive choice and blends well with many of our decorative aggregates in particular, Ringwood and South Cerney.
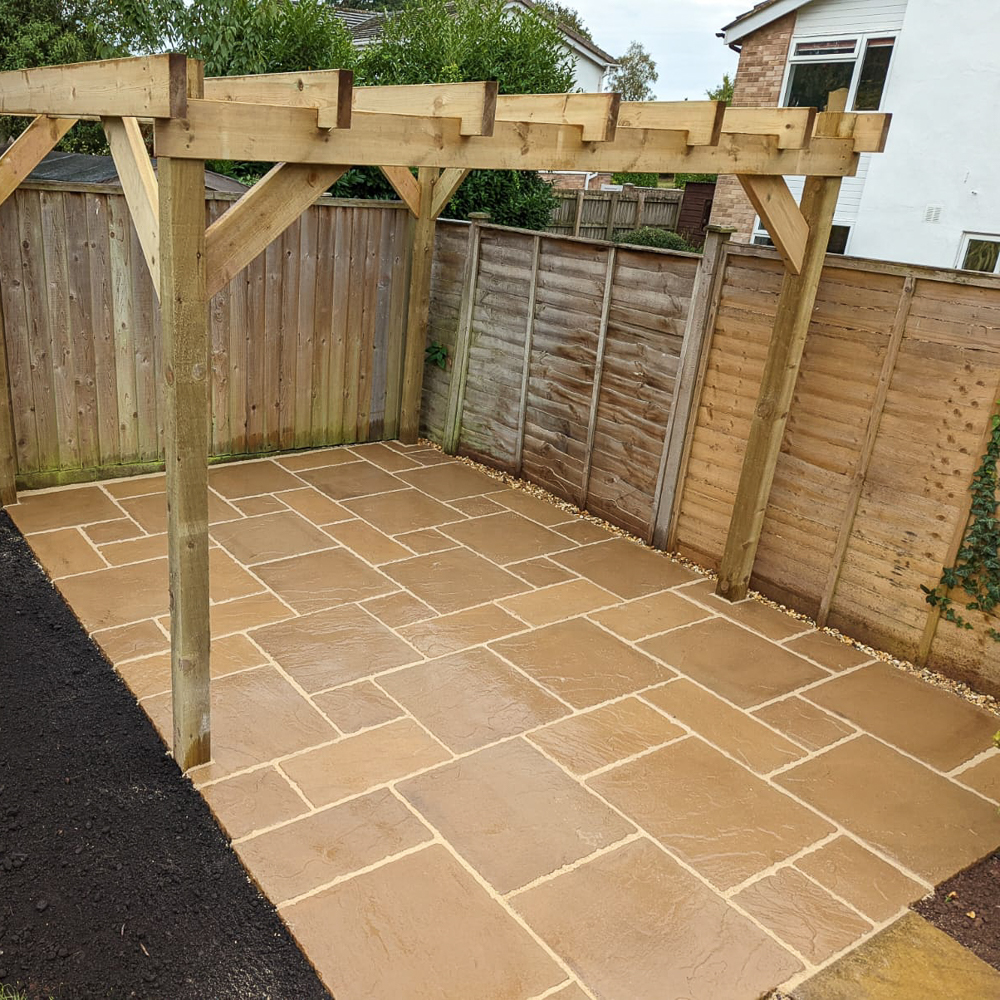
Designed & Installed by MC Building & Landscaping
Dry Appearance: Deep gold, Light Brown, honey and mild red with darker patterns and hues
Wet Appearance: Gold, Brown, Honey and Mustard
Sandstone slabs are a popular choice for a wide range of applications due to their durability, natural beauty, and versatility. When considering the use of sandstone slabs for your next project, it’s important to take into account factors such as durability, colour variations, texture, porosity, maintenance requirements, cost, availability, and compatibility with your intended use and location. With careful consideration of these factors, you can ensure that you choose the right type of sandstone slabs for your specific needs and budget, and enjoy the benefits of this stunning natural stone material for years to come.
We offer a wide variety of Indian sandstone colours for paving, walls, copings and edges.
Check out our complete range of Indian sandstone paving HERE for additional colours and styles:
We hope this Rough Guide To Indian Sandstone as helped, but in the event that you would like more guidance or advice about these products or anything else, please do not hesitate to contact us. We will do everything possible to help you.
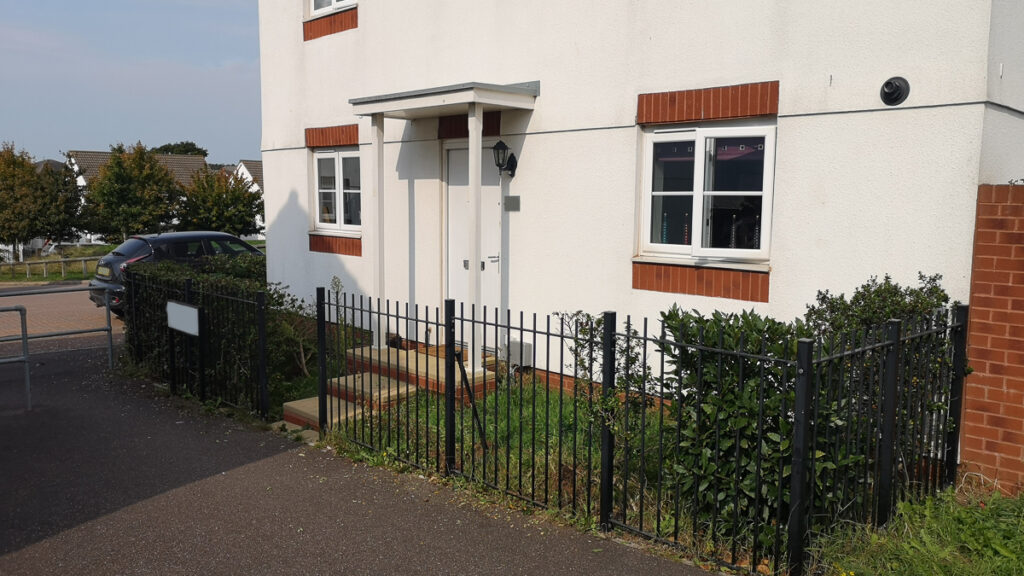
So, after dynamically procrastinating throughout the whole of Lockdown, last weekend I finally gave in to changing our front garden. The whole idea around it was to open up the front area of our house and make it as maintenance-free as possible. We (my partner and I) had finally decided on the Meadow View 40mm Blue Slate Chippings from Country Garden Patio Centre as the final covering for the area. The Blue Slate looks equally good, wet or dry and covers well on a slight slope.
Mattock
Spade
Fork
Hoe
Hand Saw
We had already cut back the Pink Escallonia hedge and the small Bay earlier that day just to make things a little easier for access to the roots, turf and the weeds.
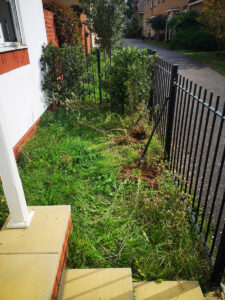
Lucky for us, the roots were relatively shallow so after taking the bulk of the hedge out with a hand saw, we could still get our hands to the roots in order to pull them out. This does prove to be quite labour intensive but the more greenery you can remove, the better.
Taking up the remains of the turf was a simple task save for a few stubborn weed roots… the Mattock comes in handy again!
I personally like to create a small channel around the border to house any folds in the membrane. This also allows a little extra weight around the edges to help hold the membrane down in the wind or trying to do the work by yourself and trying to lay everything flat at the same time.
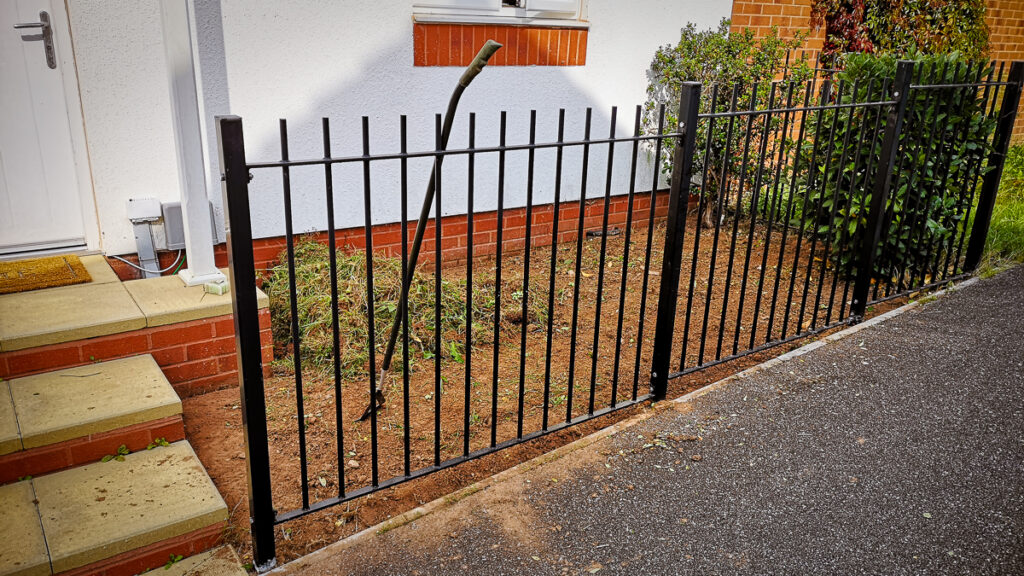
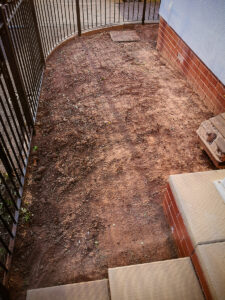 The first task was nearly done. In my haste, I’d forgotten about clearing away the excess soil and weeds. This is where, unless you have a spare truck or skip, rubble sacks would have come in handy. Instead, it was off to work to pick up the first load of 40mm Blue Slate Chippings
We had calculated the area based on 2 sections of 8m² plus a section curved around the corner of between 1-2m² which includes an inspection chamber – So around 17-18m². Now we’re into Bulk Bag territory but we decided to go for the individual 20kg bags for the shear ease of transportation and the fact we can collect them as and when we need them – I didn’t fancy having to shovel from one side to the other. So around 68-72 bags in total.
After collecting the first 16 bags and emptying them in the 1st area, we were able to use the empty bags to clear the waste.
Time for clearance – off to the Recycling Centre on an early Sunday morning! Well, 3 trips to the Recycling Centre to be precise. 2 trips of which we were able to make round journeys to County Garden Patio Centre for more 40mm Blue Slate.
Sharp Stanley Knife
As Country Garden Patio Centre do not stock weed suppressant membrane, we managed to source some 1m x 50 150gsm UV stabilised membrane on Amazon in advance for around the £45 mark. It’s a good idea to invest in a strong membrane as you don’t want to be replacing it every few years.
Unless you are tight on the measurements, I personally like to leave a bit of an overhang when cutting the weed suppressant membrane. Not only does this make it a lot easier when laying it single-handedly but also allows you to double over on the edges for an extra weed barrier.
Keep your blade sharp! Although the membrane cuts pretty easily, it does tend to blunt your blade quite quickly. For an accurate cut, change your blade frequently.
Sharp Stanley Knife
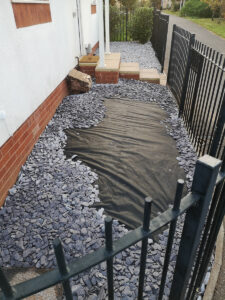
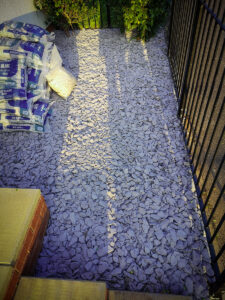 Just like a jigsaw puzzle, I like to get the border done first. This way you can titivate the edges to your area and gauge the depth. This also makes the filling in process much easier. The Meadow View 40mm Blue Slate chippings bag suggests a minimum depth of 40mm which will cover approximately 0.3m² so adding a little extra depth (and making it a lot easier to work out) we allowed 4 bags per m². 32 bags per 8m² section. The final curved section was kind of a ‘work-in-progress’ as I’d decided to remove an extra Pink Escallonia bush.
54 bags of Meadow View 40mm Blue Slate Chippings later and over 3/4 of the way there. Both sides of weed suppressant membrane are now layed and well bedded down. There is always a temptation to try and spread out the stone you have but try to avoid this as it makes it a lot harder to gauge the amount you need to finish the job and to keep the depth consistent.
The final load will be picked up over the next few days.
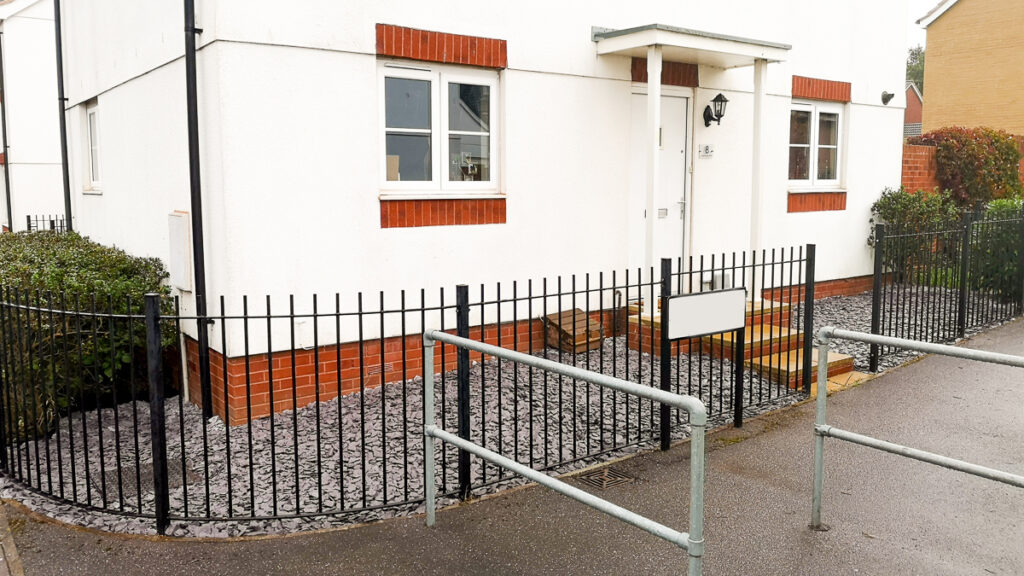
As I said above, We had estimated between 68 & 72 bags of Meadow View 40mm Blue Slate Chippings so Monday evening collected another 15 bags and the last 3 on Tuesday evening to make 72 bags in total… Not a bad guess, huh? We needed the last 3 to fill in the areas around the gas box, inspection chamber and a few of the wall vents; just to make the whole area flow to a nice gradient.
As if we’d planned it, the next day it rained and washed any remaining slate dust off leaving the finish we were after.
Cost:
(£5.99 per bag or 3 bags for £15).
TOTAL – £405.66
Things to remember:
Don’t lay your Stone too thin – The membrane is only a weed SUPPRESSANT. Moisture will still get through, the soil underneath is enough food, all the weeds need after that is daylight. If you can see the membrane from the top then you probably don’t have enough stone.
Don’t over do it – It’s been a little over 18 months since I was a Landscaper and I still ache days later! Remember, these were 20kg bags so take it easy. Even though covering your garden in chippings is a relatively easy landscaping option, if you think the work is a bit too much for you, please consult a contractor, landscaper, gardener, etc.